When I think about Xmas decor, the first thing on my mind is poinsettia. I love them because they are the only common piece of decor that the West and East share – apart from candles. Here in India, we don’t have snow (unless you happen to live way up North), we don’t have holly, we don’t have candy canes, ginger bread men, even real Xmas trees, and all those other symbols of Xmas. But poinsettia? Yes we have them in abundance, growing in the wild, in gardens and looking pretty everywhere.
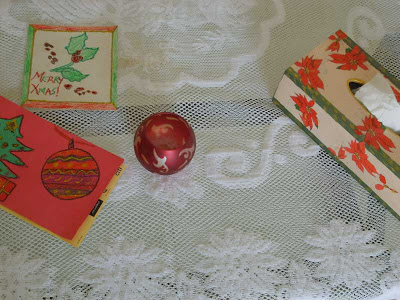
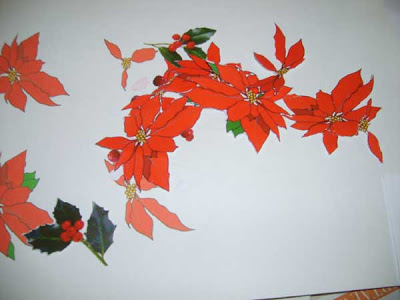
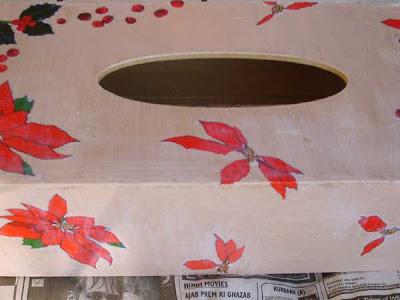
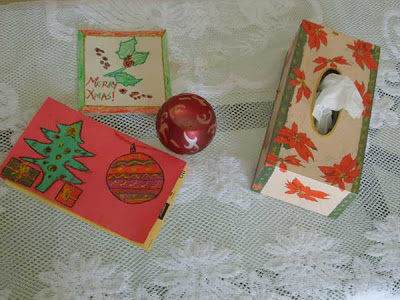
Here’s a simple way to add some (more) color to your home this Xmas. I got these poinsettia templates over here (they are free) and had them decoupaged onto a tissue box I had purchased long ago, and was just waiting to be decorated.
Things you will need:
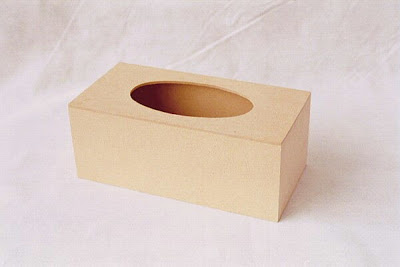
- Wooden tissue box
- Decoupage medium (ModgePodge)
- Acrylic paints – I used ‘Spring green’ for the borders, pearl orange for the base and gold for the highlights.
- Paint brush for painting
- Paint brush for applying decoupage medium
- Scissors for cutting out the decoupage designs
- A damp cloth to wipe off paint that has gotten where it shouldn’t
So here are the steps:
Step 1: Sandpaper the box, and give it a coat of pastel-colored paint. Leave to dry.
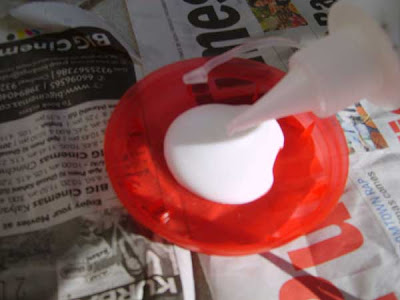
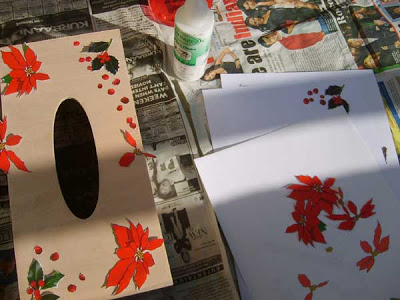
Step 2: Apply a layer of decoupage medium. When applying decoupage medium, always transfer a little of it onto a mixing plate, and gently apply with a wide paint brush. Apply in one direction only. Never transfer the left over Modge Podge back into its container.
Step 3: When the project is drying, prepare the paper.
Download and print the templates. You can either directly use a laser printer, or take a normal printout and color photocopy the same. The reason – the color won’t run.
When your copies are printed, use the scissors to carefully cut the motifs out. I used a normal craft scissors, but the trick is to hold the scissors at a slant to avoid thought sharp telltale edges.
Step 4: Arrange the cut out pictures on the tissue box. Play around a bit till you get a look that you like.
Step 5: When you are satisfied with the placements, it is time to transfer them. Carefully apply a thin layer of decoupage at the back of each motif and paste it on to the box.
Step 6: Work on one side at a time, so when the first side is over and done with, paint a layer of ModgePodge on it in the east to west direction. Let it dry. Now paint in the west to east direction. Alternate this way for 1 more coat.
Step 7: When the motifs are pasted, it is time to decor up the box. I used transparent white tape on the box to demarcate the border, and get a straight line when I paint over it. It worked! When the border dries, peel the tape off to reveal a lovely straight line. Be careful when you paint the border in places where motifs overlap the border. Use a thin brush.
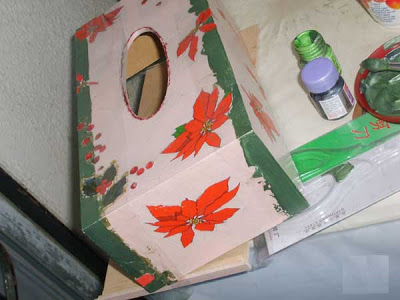
border. When the paint dries, just pull out the tape.
Step 8: Apply another layer of decoupage medium to seal in the paint. Needless to say, on all sides of the box.
Step 9: I used the gold to “touch up” and bring out the festive look. Dashes of gold around the sides brightened up the design (see pic)
Step 10: Finish off with 4 final coats of Modge Podge similar to Step 6. Let dry. You are done!
PS – You might be interested in Vasudha’s amazing decoupage done on asbestos sheets here.
Head to our Pinterest board to pin these images!




wow ,…looks so beautiful
Thanks Priyanka!:)
Looks good
where can i get the modgepodge from??
wow!! its awesome! I have never tried decoupage, but your brilliant instructions are commanding me to!
Hey,
Why are we all bit by the crafty bug???? I must say…it is very interesting…. Since childhood I loved to cut pics…. Now, not that I've become a professional….But I still love & indulge in some for my near & dear ones…
Ash….
(http://asha-oceanichope.blogspot.com/)
@ MindfulMeanderer: If you are based in India, you can buy Modge Podge from any Hobby Ideas (http://www.hobbyideas.net/)store. You can buy all your decoupage requirements there, including boxes of all kinds of shapes and sizes (my tissue box was bought there), decoupage paper, modge podge variants to get diff effects such as antique, gloss and marble, etc.
@ purplehomes – thanks! this was my first attempt tho – the modge podge makes its really easy:P
Thanks for these detailed instructions. I have seen some lovely decoupage articles, but did not know how to try it out. Your post has answered all my doubts. Thanks a ton for sharing this.
hey sharon!
I love decoupage too! thats something i like to do often….hobby ideas is an amazing place….i can spend a lot of time there

lovely work!
Regards,
Veda
Hi Veda,
Thanks! There's a Hobby Ideas really close to my place, and I have been spending a lot of time there…I'm just disappointed with their decoupage paper. The designs are so predictable.Luckily, there are lots of awesome free downloads on the Internet, that can simply be laser printed to become the perfect decoupage paper!
Sharon
Iniyaal, thank you.That felt good:)
Sharon
Thank you for the instructions sharon. Im sure going to try this.
You are welcome, Preethi!
Sharon
Lovely tutorial Sharon, the box has turned really well. Looking forward for more such adventures from you!
Thanks Rekha. You were really encouraging from start to finish of this box:)
hey sharon….loved your work….decoupage is one of my favourite hobbies that need very little time and the transformation is almost instant…
Thanks Vasudha. Decoupage is so easy, I am chiding myself for not having taken to it earlier!
Hope you are enjoying the last few days of 2 OH OH 9:)
Hey Sharon!
how are you? i am in pune now and just got back to blogging….its a wonderful DIY that you have posted here…thanks for sharing!
Cheers
Kanika